How To Make A Campfire In Easy Steps Banner

How To Make A Campfire In Easy Steps

So, you've settled into your campsite and want to get a fire going before nightfall. A well prepared fire will burn for hours if you're efficient in the assembly, leaving you plenty of time to relax into a comfy camping chair, toast some marshmallows and enjoy watching the flickering flames in great company. In this guide you'll learn how to make a campfire, as well as how to safely ignite it and clear the campfire up once you've finished with it.

Before we begin, it's worth noting a few essential safety tips:

Fire and smoke are both dangerous in different ways. For the safety of yourself and others, make sure you find a location that is a suitable distance away from tents and clear of nearby foliage which could ignite and spread the flames outside of the campfire. Second to this, keep an eye on the direction of the wind before you position your campfire, as this is the direction in which the smoke will travel. If you think that smoke is going to travel too low and right by the tents of your fellow campers, it's best practice to position your campfire elsewhere to prevent smoke inhalation, as smoke is carcinogenic.

How To Make A Campfire

Step 1: Clear an area

This is the first and one of the most important steps to any worthy campfire. Clear out a circular area of your desired size, making sure there isn't any debris, sticks or leaves nearby. Your area should consist entirely of earth - so no grass or weeds within the radius. The size of your campfire will vary depending on how many people are going to be sat around the fire, as well as how much suitable wood is available to you.

Step 2: Create a perimeter

Find some decent sized rocks to place in a circle around your clearing. These will serve as a perimeter to prevent the flames from spreading, but you'll also find it easier to balance sticks against them when you're assembling your camp fire. Once you've laid your boundary stones, create a concave in the centre of your clearing, roughly a few inches deep. This is where the centre of your fire is going to sit and where all the ashes will eventually collect.

Step 3: Gather some tinder, kindling and firewood

Tinder

Tinder is what you'll use to ignite the fire. It's essentially anything that will ignite straight away and burn quickly. Look out for things like dry leaves, bark or small, dead sticks. If you're building a fire in a damp area, you may struggle to identify some good tinder to use, in which case you can create some wood shavings by scraping a blade or sharp stone down some firewood.

Kindling

Once you've got your tinder, kindling is what you'll be trying to ignite with it. You'll be needing some small branches and sticks, however you can also use things like newspaper, toilet paper or even pine cones.

Optional: If you have them, you can use firelighters to help with this step.

Firewood

Firewood is typically larger logs, though snapping a decent sized branch into multiple pieces is an efficient way to gather some wood. The larger the log, the longer duration it'll burn for, however avoid placing large logs on the fire when you're first igniting it as they will only end up smothering the flames instead of catching alight. Make sure to opt for dry wood where possible and avoid anything damp or mossy.

Step 4: Construct your campfire

To begin, bundle your tinder together and place it in the centre of your clearing - right inside the little concave you made earlier.

Next, take your kindling and create a 'tepee' shape around the centre, above your tinder. Try leave one small opening in order to easily light the campfire later on.

Then, take some smaller firewood and construct another tepee around your kindling. This doesn't have to span to the perimeter of the fire, as this wood will eventually burn and collapse the tepee, but at that point you'll be free to start adding larger firewood to the campfire.


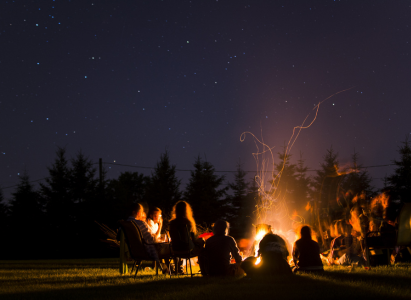
Lighting Your Campfire

Depending on how well you've planned ahead or how scarce your supplies are, there's a few different ways available for you to light your campfire.

Matches

Matches are useful as they're inexpensive and you can throw them straight into your tinder. They'll also burn up themselves and serve as a tiny bit of kindling.

Lighters

Using a cigarette or candle lighter, it's best practice to light the tip of a thin stick and insert it into the tinder, rather than putting the lighter directly towards it. This is just on the off-chance that there is any excess lighter fluid on the outside that could accidentally act as an accelerant. You can also use some weatherproof fire starters, so if you're learning in advance rather than out in the field right now, you've got time to grab some!

How To Light A Fire Using Sticks

For that traditional survivalist experience, you may want to have a go at lighting your campfire using sticks. It's much more long winded than other methods of lighting campfires, but it's a rewarding experience creating a fire entirely from scratch.

In order to light your fire using only sticks, you'll first have to find a sturdy, dry log that can be chopped and shaved down to create a fireboard. A fireboard is essentially a small, flat piece of wood with some holes shaped inside of it, which are used to place the sticks you'll use to twist and create friction.

Once you've got your fireboard, find a dry medium length stick that's strong enough to not snap under a bit of light pressure. Shave down the bark with a knife or sharp stone all the way around the stick.

Next, place the stick upright inside the tightest fitting hole in your fireboard and position the stick between the palms of both of your hands.

Begin rolling the stick within your palms, making sure to apply some pressure downwards as you roll. Once you've got a rhythm going, you should begin to see tiny embers and smoke appear from the base, in which case it's now time to speed up the rolling, as there's almost enough friction to ignite the fire.


Cleaning Up Your Campfire

Once you're finished with your campfire, it's time to put it out. In order to do this, you'll be needing some water. A bucket is useful, but they're not always brought along on camping trips so you may have to settle for your camping flask. Fill up your container with water and pour it generously over the base of the fire. As you pour the water, grab a nearby stick and begin stirring the base of the fire in order to wet the entirety of the ashes and put out any remaining embers. It can take roughly 15 minutes to put a fire out entirely.

Remember: Leave No Trace

The outdoors is for everyone, so it's only fair that you clean up after you've finished in order for the next group to enjoy themselves. That means keeping in mind some of the princples of leave no trace.

Once your ashes have safely cooled down (you can check this by placing the back of your hand slightly above the pile), scatter the ashes in various places nearby so that the ground looks relatively undisturbed. Make sure you don't leave any litter either!


Find this article useful?

If you liked this post, be sure to check out some of our other great camping content, including camping recipes, how-to's and other bits of family fun.

rg_uk-Blog - Author - Chris Taylor

Chris Taylor

Chris covers all things gear and lifestyle related for Destination Outdoors.

Publish Date: 07/07/2020